Havasu Adventure

INTRODUCTION

Havasu is a Native American Reservation located in Arizona near the Grand Canyon.

It has a population of less than 1000 and covers about 300 square miles

There are many blogs (this is the one we tried to follow) and vlogs about this and this is just one more that I hope adds things that I did not know or could not find in the aforementioned areas.

HOW IT HAPPENED

A very good friend of mine is a fitness, adventure, outdoors junkie. She has done ultra marathons to hiking the Dolomites, Volcanos in Guatemala, to Hyrox competitions and much much more.

She’d been wanting to do this 4 day 3 night Hike since the pandemic and earlier this year while having dinner with 2 of her friends (who also came on this trip) went on the website, registered for their lottery and was able to secure 7 permits @ $470 each.

Havasu Tribe opens up this hiking camping adventure for a limited time every year and it sells out FAST!! As mentioned, for an extra fee ($100 I think) you are enrolled in a lottery.

You pick some dates and number of people/permits and you pay. You are now the TEAM LEADER.

In March, she asked me what I was doing from May 6th to May 9th, 2024 and if I wanted to go on this adventure. I accepted and so glad I did because this turned out to be a once in a lifetime experience.

REGISTRATION DETAILS

Here is a link to all the information about obtaining a permit. You will need to read and dig. I had trouble understanding it but be patient. I am sure you will find everything you need to register for your own trip.

SUMMARY

  • Saturday, Day 1: Traveling: From Atlanta to Las Vegas
  • Sunday, Day 2: Traveling and Prep: From Las Vegas to Havasu Lake
  • Monday, Day 3: Day 1. From Havasu Lake to Registration and Trail Start. 11 mile hike
  • Tuesday, Day 4: Day 2. From Havasu Camp Grounds to Mooney and Beaver Falls. 9 miles
  • Wednesday, Day 5: Day 3. Rest day. Optional Quest to hike The Confluence. 21miles
  • Thursday, Day 6: Day 4. Pack up and hike back to Hualapai Hilltop (Staring point) 10miles

MY PACK AND EQUIPMENT

Let me preface this by saying if you have the budget, it’s worth going to REI or some place to find high quality LOW WEIGHT items. When you’re out in the wild, carrying your own food, water, and essentials; you’ll appreciate you spent the extra money.

Here is a list of basic things my friend made to help us. We met a week before with the others (7 in total. 5 of us live here in Atlanta while one live near Tampa, Florida and the other lives in East Tennessee).

THE PACK

I first ordered a Teton 65L pack than was small. According to the internet your pack weight should be no more than 20% your bodyweight. Be mindful about the weight of your items then widdle it down to if you really need it or not. I ultimately returned it and ordered the Teton 85L pack.

Weight: 5.8lbs

THE TENT

Again, I went the budget route and purchased the Forceatt Backpacking Tent from Amazon. it performed well. Just heavy.

This is a 2 man tent. What I really liked was that I was able to keep my pack next to me, out of the elements. I may opt for a 1 man to reduce weight but it’s nice to be able to secure your pack with you inside.

Weight: 5.5lbs

SLEEPING/MUMMY BAG

Went for the Teton Sports LEEF Mummy Bag, long version – I am 6’2″, 0 degree.

Weight: 4.2lbs

OTHER ITEMS

  • Inflatable Sleeping Pad – 12.3oz. Maybe a little small but functional. I would recommend buying a portable inflator or mini air pump. Or possibly a foam pad.
  • Trekking Poles – there are sooo many options for this. These worked perfect
  • Stove with Ignitor – can’t go wrong with this set. So small and the built in ignitor is clutch.
  • Two Cup Cook Set / One of our team had the Jetboil Stove and it was awesome. Maybe too big but well worth it
  • Camping Spork – need something long because the dry meal packs are deep. This also has a knife and spark fire starter in the handle
  • 5 Pack Dry Sacks – these sacks are awesome. There is different sizes and colors and I used them to designate food, clothes, medical, toiletries, etc. They are water proof. The bag itself folds up (take the air out first) and then bends and clips together for a convenient handle to carry and hang.
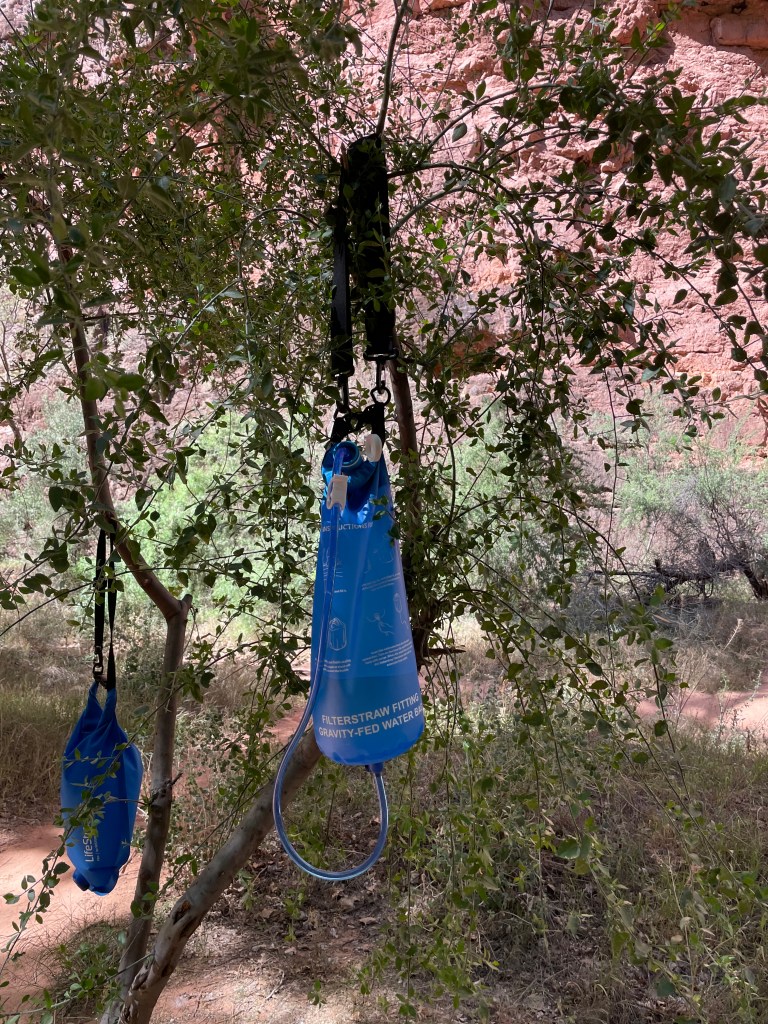
  • Gravity Water Filtering System – this is a great set. It comes with he “Straw” filter. Doesn’t take long to filter water either. Fill up the “dirty” water, fold to designated line and clip for no spill. Comes with a sling to carry or hang. Just hang it up on a branch, attach to the filtering straw and let gravity do the work.
  • 3L Hydration Bladder – this worked great. Never leaked. The only thing I would add/change is to have a nozzle that will allow quick release to fill up a cup or stove for water. Otherwise, you have to suck the water out of the bag. Not a big thing but one of the team had one that had a quick release.
  • Multi Tool – has a mini ax, hammer, pliers, and other tools. Heavy but very useful for hammering steaks into the ground.
  • Camping Pillow – this was clutch. Most people stuff their jacket with clothes to reduce weight.
  • Water Purification Tablets – never used them but had them just in case.
  • Silicone Collapsable Cups – didn’t need it since my stove had 2 cups in it. You will need them if you buy the JetBoil and not the Two Cup Cook Set
  • First Aid Kit – you can probably piece one together but what I did get was Blister Aids but Moleskin pre cut is what one team member had. Also took plenty of Advil
  • Hammock – super comfy
  • Chair – I highly recommend splurging on the REI version that weighs 1lb with a back. This one was too heavy to and clunky to bring.
  • Carabiners – to clip things to your pack
  • Cord / Rope – I bought it from Walmart
  • Headlamp and a flashlight – headlamp with a red light option is good. Super helpful if you have to set up your tent in the dark
  • Smart Wool Socks
  • Slippers or Slides
  • Small JBL Clip 2 Speaker
  • Uno and Playing Cards
  • Solar Battery Bank – this one has 4 solar panels but…. Solar only works if you have 5 hours of direct sunlight and even then it never recharged fully. Plus we camped under a canopy of trees near a stream so we never had full view of the sun and you don’t want to leave it out in heavy traffic area for fear it may get stolen or walked on. I recommend a simpler batter bank. The 30,800mAh wireless portable charger. What I like about this one is it has wireless charging AND 2 USB 1 USB C outputs BUT it requires a USB Mini to charge it up. I took 2 of these plus the Solar one and only used the Solar and half of the other one to charge my Garmin Epic 2 watch and iPhone 12.
  • Garmin Epix 2 – this is the top of the line hiking watch. You can use an Apple Watch but you will have to charge it everyday. The Ultra 1 or 2 will last 2-3 days for sure.
  • Satellite Communicator – not necessarly needed but nice to have if something happens. This unit will track your hike and get you back to home base and serve as an SOS in case the worst happens.
  • Tarp: either 1 big enough to set underneath the tent for extra water protection AND a “floor mat” before you enter your tent or 2 small ones for the floor mat and one big enough for your tent.

MEALS, SNACKS AND OTHERS

  • There are so many dehydrated meals but the best ones can be found in the REI website. I particularly enjoyed the Peak 2 brand. I used the 2 servings
  • Oatmeal Packs
  • Tuna Packs – Plain and Flavored
  • Peanut Butter – either jar or squeeze pack to save weight
  • Cliff bars
  • Fat Meat Beef Jerky
  • Atkins Bars
  • Nuun – these tablets provide electrolyte replenishment
  • Gatorade gel drinks
  • Jelly Bean Energy and Electrolyte

WHAT I LEARNED AND HOW I WOULD FIX THEM

  • I would have spent a little more money, by going to REI, to get lighter better quality gear. Pack, Tent, Sleeping Bag, Chair, etc.
  • Tighten shoe laces. My shoes were loose which gave too much play with my feet, especially my toes, which caused great pain and discomfort towards the end of Day 1 Hike. On Day 2, it dawned on me to tighten my laces. It was a game changer. As soon as I did that there was no more play, I presume the top of my foot comfortably absorbed impact and minimized foot movement. You want to get a half size up regardless. This left both my toes purple and bruised and I did get about 3 blisters. I will most likely loose the toe nails.
  • Cinch up pack straps. There was a pair of straps on the top of the shoulders that were not tight causing a gap between the pack and my back which gave me severe soreness on my traps. Once I cinched and closed the gap the pain went away.
  • Proper Pack Fit: You are supposed to measure from the pointy bone at the top of your spine all the way down to you waist hip bone/between the dimples and that is your torso length. You should tighten the waist strap on your hips to carry the majority of the load and make sure your chest strap is tight as well.
  • Pack the heaviest items at the bottom of the pack
  • My pack was around 45lbs but I did not factor 3L of water which pushed it well over 50.

TRAVEL AND PREP DAYS

I left Atlanta to Las Vegas on Delta at 7pm EST and arrived in Las Vegas at 8pm PST. We stayed at the Motel 6 near the MGM and it was really bad but we knew it was for only one night.

We drove to Lake Havasu which we thought was near the check in place, Grand Canyon Caverns, but was 2 hours away. We stayed at an Air BNB where we did a last minute pack adjustment and went to bed.

DAY 1

The check in as at Grand Canyon Caverns which is about an hour from the starting point.

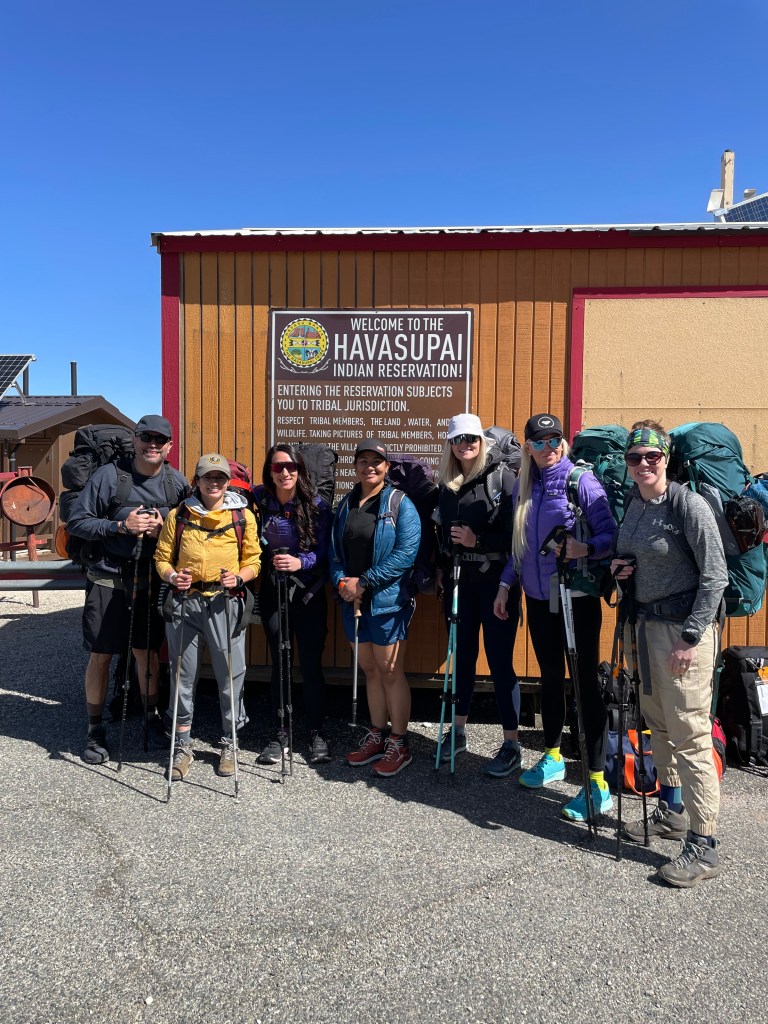
We drove about 2 hours to Havalupai Hilltop which is the starting point of the Havasu Trek. We had to park about 1 mile from the starting point because it was full.

We arrived at Hualapai Hilltop and parked about a mile from the starting point. There were a lot of people there already. We secured our packs and began our descent to the Camp Site.

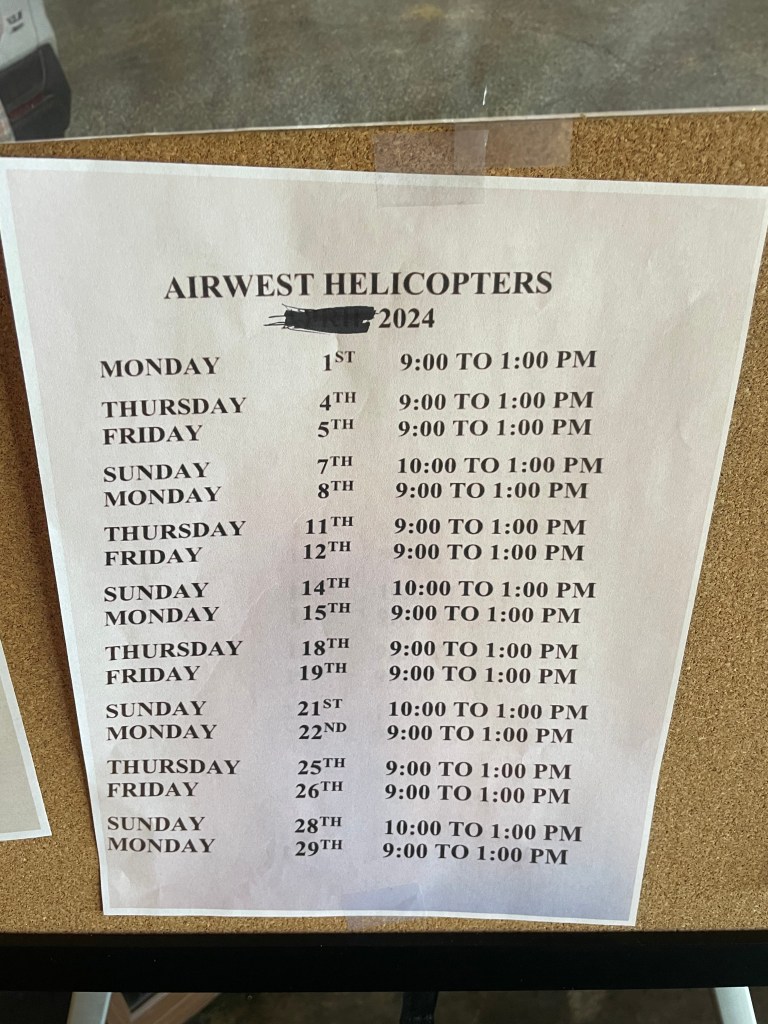
Visitors can choose to enter or leave the camp grounds via Helicopter. I believe the cost was about $100 one way and is first come first served.

The descent was rough, lot of pounding but then it leveled off and we took a snack break then a lunch break. Right around mile 8, we entered into the Supai Village where we did have cell service. The community has a store, cafe, school, church, and much more along with the helipad.

Visitors can also choose to have their packs brought in and taken out by Mule/Horse. ($200 one way and must be reserved in advance.

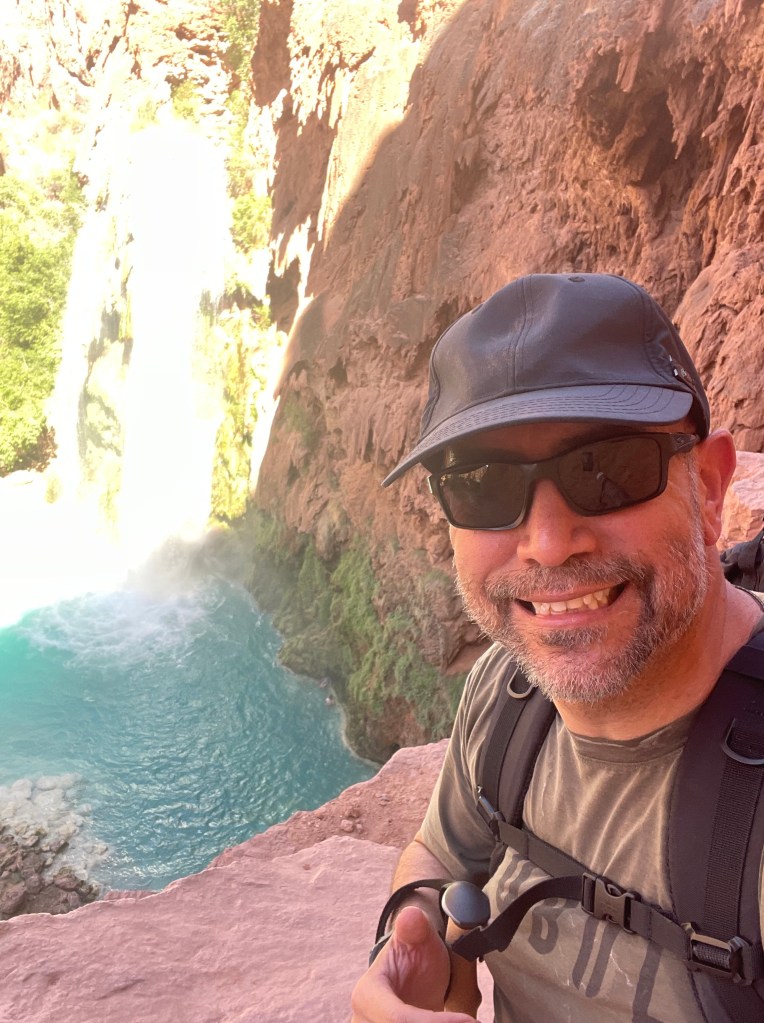
Havasu Falls is about 1.5 miles from the Supai Village. The trek there was ascending which made things a little harder.

There is a creek/stream that runs along the camp ground along with various Compost Restroom stations. The latrines have individual stalls, with a seat and toilet paper but no plumbing. Therefore, the waste goes into a plastic bag and you put mulch for composting.

We found a nice spot along a stream with rushing water where we set up camp.

WATER

We knew coming in we’d have to carry our own water and luckily there was a spring available.

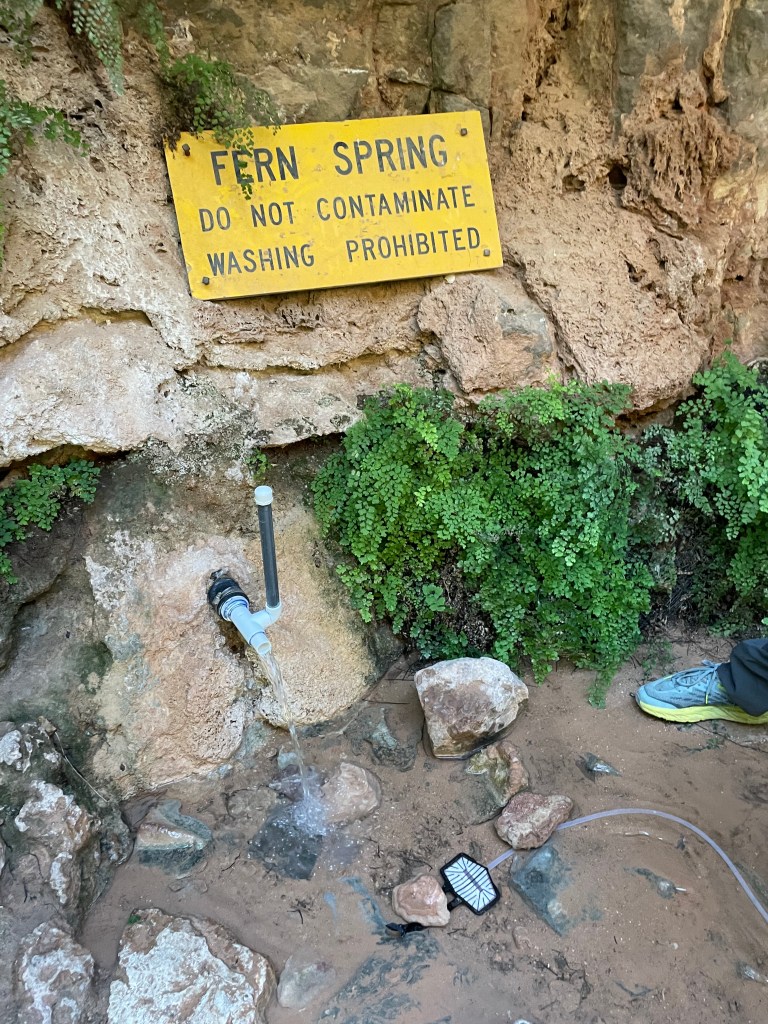
Technically you can drink from the spring but most of us decided to take an extra precaution and fill up “dirty” bags to have it filertered

We set up camp and had our dinner before we turned in. Dinner consisted of heating up water then pouring the hot water in our dehydrated food packs.

DAY 2

We woke up and had breakfast. Our goal today was to do Mooney and Beaver falls. The guide said 4 miles round trip but we were mistaken unless we took a wrong path.

AllTrails LINK

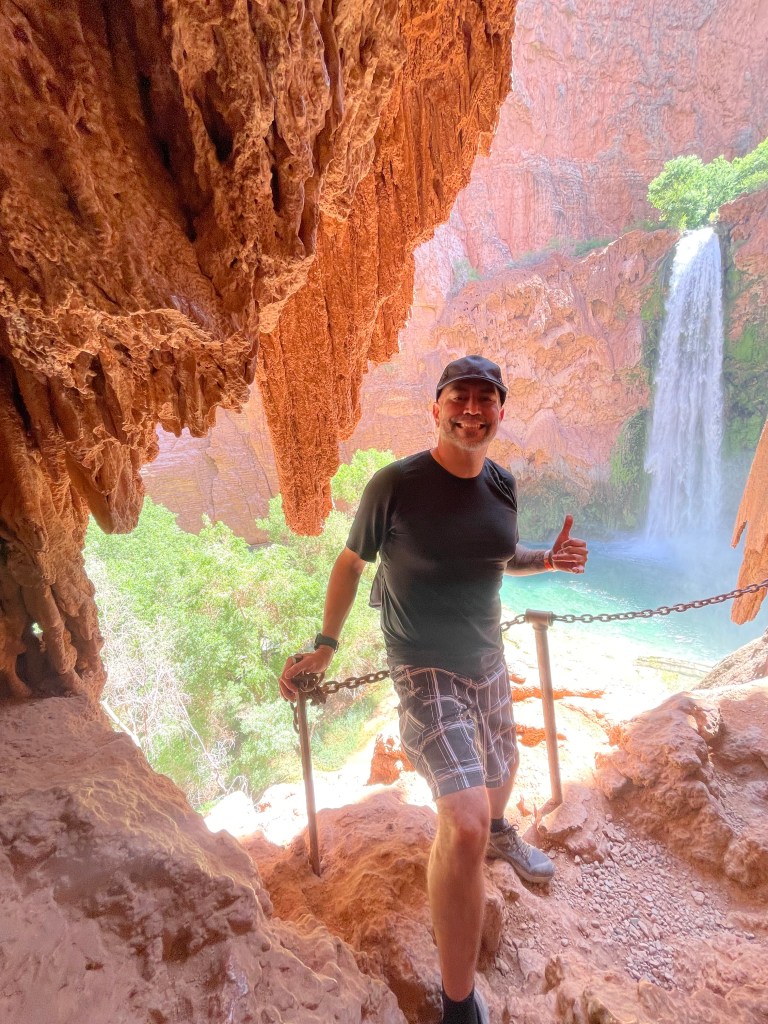
Mooney falls was very close to our camp. From the top you had an excellent view of the falls. We had to descend through some caverns and steep walls and stairs with some chain railings. The interesting thing is that at the top there was a pile of gloves for anyone that needed them. I can tell you, they’re not needed but it is a tough descent. Foot placement was challenging and you needed some upper body strength to help you ge to the bottom

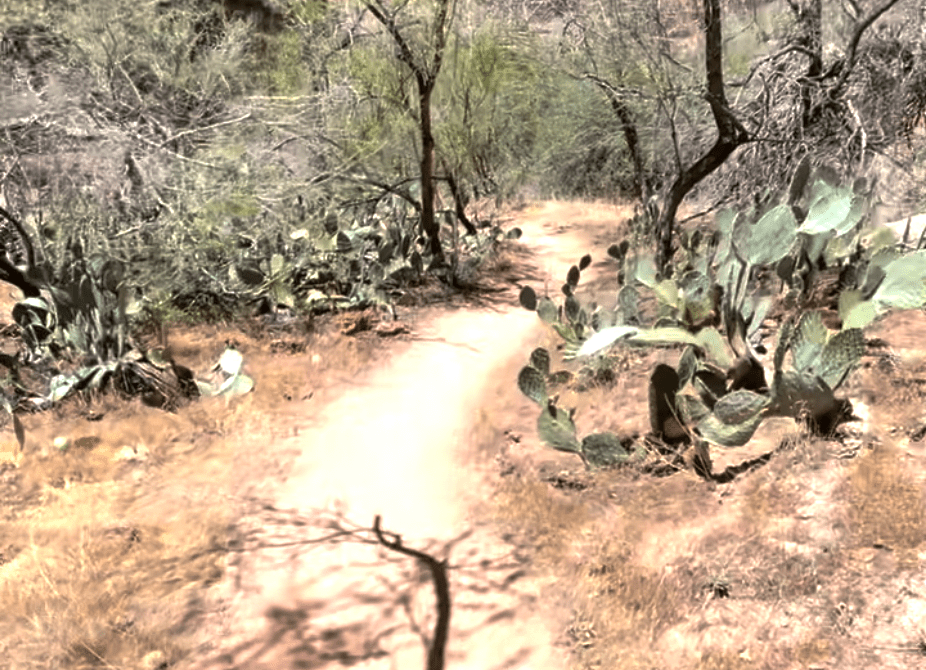
Once down, the journey began through beautiful sceneries with a “Jurassic” style trail full of lush growth and cacti

We finally arrived at Beaver Falls where there were pools among pools from the beautiful Waterfall.

On our way back we encounter some ram

We finally made it back to camp where we rested and prepared our dinner.

DAY 3

Day 3 was supposed to be a “16” mile side quest to THE CONFLUENCE. That is where the Colorado river meets another river. I had to take a rest day because my feet were in pain from the errors I made in Day 1 that I mentioned above.

Two of my team members went on the quest. They left at 4am with their essentials (water, snacks, food, stove, etc) and returned at 2:15pm. They said it was a 21 mile round trip instead of 16.

DAY 4

We woke up early to break down camp. 3 of us made the trek out while the other 4 flew out via helicopter. I believe the helicopter cost was $100 each / cash from the Suapai Village / a 2 mile hike from the camp grounds.

The hike back was much better since I learned from my mistakes. We stopped twice. Once for Snacks and then for Lunch with the occasional “pee” breaks.

The return is definitely more challenging because you’re ascending. The last 3/4 mile was the hardest because you’re back at the switch backs. Imagine being on a stair master with a 50lb weight vest for an hour.

SUMMARY

What an amazing experience. I could not have done this with out the facilitation, help and support of my friend Lindsey.

Pictures do not do it justice. The trek was tough but well worth the pain. I learned so much and being off the grid was nice.

I definitely recommend this to anyone with an adventurous spirit.

My first tandem skydiving experience

Been on my list for a while. I finally decided to register for a Tandem Skydiving experience.

I registered with Skydive Monroe, about an hour away from Atlanta. Their site is very easy to navigate and I registered for a Friday 2pm appointment.

The basic cost to register is $245 and I added the Outside Video and Stills package of $175 for a total of $420

Tandem Skydiving is a way for anyone to experience free fall and parachute deployment with the safety of a Tandem Instructor secured to ones back.

I arrived at the hanger around 1:30pm and waited for them to call us in to the instruction room. There were only 2 others there and there were only 2 instructors and a couple of videographers.

They called us in and we viewed a video. The video was narrated by a man who was instrumental in developing the harness used in Tandem Skydiving. There are other methods to do this but they didn’t go into detail. The video reenforced the risks of skydiving and we had to fill out a double sided paper waver where we initialed each paragraph, signed and witnessed.

My package included a free T-shirt.

When it came time, the instructor went over some safety instructions. Stay calm at all times, I could not jump if I felt unsafe, to keep my arms in at the door, arch my back during free fall, and other simple hand signals to make sure I was ok at all times.

He secured the harness on me and he strategically chose the proper parachute for Tandem. A bigger chute is needed because its more weight.

At this time the videographer did his thing with fancy camera movements and an interview. The finished product is outstanding.

They provided plenty of pictures and 3 very nicely edited videos.

Back to the experience! We walked on the tarmac as I followed the instructor inside the plane and sat facing the tale. There were 2 rows of benches long way. We took off and he gave me the goggles and told me when it was time to scoot back so he could secure himself to me.

We climbed up to 15,000′ and we scooted forward towards the door. The videographer gave me tips to look up and do whatever while he filmed. His gopro was connected to his helmet.

At the door we waited until the light turned green giving us the go ahead to jump. I was a little nervous but excited about what was about to happen. At the door, it was a bit scary because there was nothing between the plane and the ground. Surprisingly, I did not get any scary sensation as your would looking over an edge of a building.

We rocked back and forth and exited the plane doing a small flip. Once facing down the instructor deployed a mini chute. It’s either to keep us level or as an indicator where we were.

We dropped 10,000′ in free fall in almost a minute. All the while the videographer made his way to face me. I stretched out my arms and kept my legs inside my instructors legs and looked up. Occasionally looking down and how small everything looked.

The wind was strong and very happy to have the goggles.

Right about 5,500′ the chute deployed and it was a good deployment. If something had gone wrong the instructor would have cut away the chute and deploy the reserve. The instructor said he’s only had to reply the reserve 6 times solo and 16 times in tandem.

It was a jolt when the chute deployed. Like slamming on the brakes. He told me to stand on his toes to loosen the harness a bit. He guided us down and allowed me to hold onto the handles. Pulling on the left handle made the chute turn left and the right turn right. Both handles, applied the brakes. Amazing how 2 handles were able to control the direction of the parachute.

One of the skydivers that jumped first had to cut away and deploy his reserve so the instructor kept a close watch on him.

We circled and began our decent in a strategic pattern to the landing area. As we approached the ground he instructed me to pick my feet up like in a sitting position. We gently touched down and he unbuckled himself.

The experience was exhilarating. Delfinately would do it again and am seriously considering doing AFF where I would be certified to jump solo. The AFF course is an all day event with 3 jumps. You jump with 2 instructors.

How Many Watts does an 8000btu Window AC Pull?

Thank you for visiting. Below is the YouTube clip along with details and links to the items seen in the video in case you’d like to purchase them.

I installed a GE Window Air Conditioner 8000 BTU in my camper van and wanted to know how many watts did it pull. I connected an Electric Usage Monitor between the outlet at my camper van to measure how many watts it pulled along with a hi and a low and let it run for 18min.

I did have a 12 Volt Refrigerator pulling 14 watts during this test. I ran the AC for 18 minutes which resulted in:

  • Kwh: .209 Kwh
  • Volts: 117.3
  • Amps: 6.752
  • Low Watts Recorded: 14.1
  • High Watts Recorded: 786.0
GE Window Air Conditioner 8000 BTU, Wi-Fi Enabled, Energy-Efficient Cooling for Medium Rooms, 8K BTU Window AC Unit with Easy Install Kit, Control Using Remote or Smartphone App
kuman KW48 Electricity Usage Monitor Plug Power Watt Voltage Amps Meter with Digital LCD, Overload Protection and 7 Display Modes for Energy Saving (Backlight), white

Equipment used in the video:

Track Day Video Telemetry Data Overlay

I am obsessed with creating content to post to YouTube and what better content than Track Day Videos.

It would be easy to suction cup a GoPro on the windshield and hit the record button during each session. But the end result is just your point of view driving through a road course. That’s where Telemetry Data can make things a bit more exciting to the viewer.

TELEMETRY DATA

Telemetry Data is data recorded by a gps logger that is then interpreted by software that overlays speed, g-force, track position, and time. You can add an OBD II sensor to add vehicle data such as RPMs, Throttle, Air Intake Temp, etc. Adding an ECU reader can then collect brake pressure, current gear, etc… The options are limitless but may require more devices to record data and need special software to sync to a video.

Cars like the Corvette and Camaro have in dash PDR built into that can produce a very nice video.

APPS AND RECORDERS

Porsche has it’s own app called Porsche Track Precision that connects your smart phone to your Porsche via WIFI and with a windshield suction mount your phone can record dash video and the app will overlay data (Track Map, Speed, RPM, Throttle, Brake, Gear, Over/Understeer) as well as a Summary of your laps that can export individual laps or the full session so you can upload it to YouTube.

The negatives:

  • App tends to crash in the middle of a session
  • Only displays KPH
  • May require to resync data to video
  • Shaky video

There are plenty of devices race enthusiasts use to collect data but it can be in the thousands of dollars

But you don’t have to brake the bank to get simple track video with overlaid data (Speed, Track Map position, Lap Times, G-Force). There are plenty of Apps that can produce great quality videos

Just to name a few, you can go into your own App Store and search Lap Timers for other programs.

I love RaceChrono Pro because the overlay is clean. I don’t have much experience with Harry’s Lap Timer because I found the interface to be a little more cumbersome but the video I have seen the overlay is not as clean but they have an excellent 3-2-1 when you’re about to turn into a turn AND it names which turn you’re on with speed. I may push through and test it on my next track day.

RaceChrono Pro is the only program, I have found, that can import GoPro video with data.

UPDATE: I recently went to Barber Motorsports Park in Birmingham, AL where I tested out Harry’s Lap Timer. Below is my fastest lap at Barber. Here is my review: It’s a good program but RaceChrono Pro is easier to use. There are too many settings in Harry’s. I was able to pair it with my OBD II easily but I am not sure the data is correct or in sync. I was only able to figure out how to export 1 lap at a time and not the entire 13 lap session. I thought I found a setting but it ended up merging a video file without the gps log. I really like the Turn Numbering and Speed at the Straight and Turn pop up.

All you need is to mount your phone under the rear view mirror and away you go.

But! If you notice image quality is a little grainy AND shaky. More on that below

OTHER POST PRODUCTION TELEMETRY PROGRAM/SOFTWARE

There are many other programs that can take your video and GPS logged data to render a nice video.

The only ones I have experience with is Race Render and Telemetry Overlay. I did not like the interface of RaceRender and Telemetry Overlay does the trick but the overlay and delta information is not as clean.

The issues I had was data sometimes did not sync well AND the finish line was often wrong. Both of these cost money and have tons of settings that can be adjusted. It’s too much of a rabbit hole that I am not committed to do.

A SIMPLE SET UP

I use an iPhone 7 attached to a, non swiveling, horizontal phone holder with a GoPro sticky mount underneath the rear mirror for a lower profile. Suction cup mounts can be big and cumbersome and the ones with screw on attachments can be the worst because you’re pulling so many G’s that your phone can loosen and swivel away from the dash view. The other issue is glare and fuzzy image caused by the tiny rock chips and bug splats on the windshield. But Glare is the worst offender.

Using this set up you can export video that can be uploaded directly to YouTube for sharing

This has now become my redundant system

HIGHER PRODUCTION QUALITY

I’ve taken it a step further. I now use a GoPro Hero 7 Black on a GoPro suction mount either on the glass or above it aimed slightly higher than the hood. The GoPro Hero 7 Black produces outstanding quality AND it logs GPS data (you must make sure the GPS is turned on AND not in quick shot mode).

  • Another thing to keep in mind is that with the outside camera, the lens is susceptible to damage from track debris. I’ve had to replace my lens twice. The GoPro Hero 7 and 9 have replaceable lenses the 8 does not.
The Tow Hook Camera was not a pleasing angle and more prone to damage

The downside is power. There is no way to hardwire safely outside the car so I had to buy 2 additional batteries and a charger. I swap batteries between sessions. Each session is 20-40mins long and could record 2 sessions but most likely it will run out of juice in the middle of the second session.

I have also added a second GoPro (a hero session) inside the cabin to get a view of me and my instructor. I once again used a GoPro sticky mount centered on the back windshield and then feed it power with a usb cable connected to the cigarette charger. (Note that GoPro Hero 6 and above will not charge while recording)

GOPRO SMART REMOTE

I paired both GoPro’s to a Smart Remote which allows me to power on and start and stop both cameras with a touch of a button. In theory this is the best controller for 2 GoPro cameras.

But sometimes only 1 connects and sometimes neither. Or in the middle of a session they both will disconnect leaving you wondering if they’re recording at all. Sometimes you think they are recording and they’re not and sometimes you think you stopped them but they didn’t or one stops and the other doesn’t. It works 75% of the time. Just be prepared for the 25%.

Worst case scenario, you start the cameras recording manually and just have to trim them later. Make sure you have a large enough sd card so you won’t run out of space

POST PRODUCTION

At the end of my track day I go home with 4 sources.

  • iPhone 7 Dash Recorded Video with Overlay (for redundancy purposes)
  • GoPro Hero 7 Black (has GPS data logger)
  • GoPro Hero Session (in cabin forward view)
  • GoPro Hero 4 (optional outside reverse camera)

Here are the next steps:

  • Import the GoPro Hero 7 Black videos into my iPad running RaceChrono Pro. This can be tricky because GoPro splits files greater than 4gb and name them in a manner that is not sortable. You’d have to sort by date in ascending order.
  • Name the session.
  • Trim the start and end time then export (AirDrop) to my Desktop computer (27″ iMac 2019)

On my Desktop, I run Final Cut Pro. It’s overkill but it allows me to overlay video Picture in Picture style. iMovie can do the same but it can only do 1 and sometimes I have a rear view which is 2 picture in pictures

In Final Cut Pro, I create an Event that groups all the videos in one spot. Then I create a projection for each individual session. Both exported RaceChrono Pro rendered video and Pro Hero Session files are imported into the event

This is where things can get a bit tedious but the final result is excellent!!

BUT RUBEN, I HAVE A PC

Final Cut Pro is available for PC but just like for the Mac it’s $299. There are many many other alternatives but the one I have hear a lot about is Filmora. I believe it’s $70. From what I have seen, pretty much all the editors will have the same or similar layout. The bottom is the timeline where you can drag and drop clips, the upper right is the preview and the left is the file list along with a directory/transition/titles.

What you’re looking for is something that can do Picture in Picture and can scale it or “transform”. Which should be pretty standard on any Video Editor

Do a quick google search and watch YouTube Reviews on the Editor you’re considering.

Rennsport Dragon Rally

A friend of mine, Sean Phillips, recommended I sign up for this event about a year ago. He said it was a great experience with great people and with only Porsches.

Josh Vandergriff owns and operates Rennsport Dragon Rally among other events. Twice a year, June and October, he organizes a 3 day event centered around the The Tail of the Dragon. Tail of the Dragon at Deals Gap with 318 curves in 11 miles: America’s number one motorcycle and sports car road.

GROUPS

CRUISING GROUP: A leisurely cruise through these mountains roads, as you would do during a Porsche Club drive.

TOURING GROUP: A step up from a cruise, where you will have some spirited driving mixed in. This is what most people would refer to as a “spirited drive’. 

SPIRITED GROUP: This group is for former participants who know what to expect, drivers who really know these roads, or drivers who really know their car well and have significant driving skills.

DRIVING ITINERARY

FRIDAY, JUNE 4th 255 miles of driving
8am:  Check-in opens
9am:  Driver Meeting
10am: Staging and starting of drives
12:30 – 2:30pm: Lunch stop and open-house at Ohlin’s Suspension (they have three food trucks, and an ice cream truck. There will be BBQ, German, and Cuban food options)
6 – 8pm:  Welcome Dinner at the Fontana Village Resort Event Center

SATURDAY, JUNE 5th – 245 miles of driving
9am: Driver Meeting
10am; Fontana Dam takeover and Photo Shoot Parade
12:30 – 1:30pm: Lunch stop in Maryville, TN (everyone is on their own for lunch and there are more than enough options)
4-6pm: Block takeover at Appalachian Driving Experience (everyone is on their own for dinner and there are 20 restaurants within a 1.5 mile radius)
7pm: Carolina Room at the Fontana Village Resort is reserved with a keg of beer and cash bar available

SUNDAY, JUNE 6th – 234 miles of driving
9am: Driver Meeting
11am: Snack stop
2:30 – 4pm: Late lunch / early dinner stop in Maryville, TN (everyone is on their own for food and there are more than enough options)
5:30pm: Return to Fontana Village Resort for the conclusion of the Spring 2021 Rennsport Dragon Rally!

LODGING

The event is held at Fontana Village Resort and Marina. Very interesting story behind this resort. From what I understand it was built to house the workers who built the damn then it was sold and converted to a resort. The resort is quant but dated. There is no cell service and their wifi is decent.

The have the traditional rooms in the main lodge along with cabins spread out through the property. It has the basic amenities of lounging areas, pools, 2 restaurants and a large convention style room to hold meetings.

COST

Rennsport Dragon Rally Registration: $149

Lodging for 3 nights: $329

DAY 1, Thursday, June 3, 2021

Met up with a group from Atlanta at the Quick Trip off Old Milton Parkway. We drove up and did Blood then made our way to Fontana Dam, NC where the resort is. Before we arrived we did the Skyway and Dragon but it was raining. Regardless we had a spirited run.

I met some great people. Michael and Colby in a 2015 Porsche Carrera 4S, Jeff Wolf in a Porsche Targa GTS4, Porsche Turbo,

Once we arrived at the resort we checked in. I stayed in room 107 while others were in cabins

REGISTRATION

Drove down to the Event Hall to register. There we signed a waiver and was given a pretty nice swag bag

From there I went up to the main lodge to have dinner where I met up with my new friends.

DAY 2, Friday, June 4th, 2021

We met up for the Drivers meeting at the Event Hall then we dispersed into our groups. I was in Group 1 but we couldn’t have a great drive because most of the day was spent behind local traffic.

We stopped for lunch at Ohlins, a performance shop and sponsor of the event. They had several food trucks. BBQ, Cuban Sandwhichs, German Schnitsels

DAY 3, Saturday, June 5, 2021

This day was much better. Began with a buffet breakfast at the main lodge, lined up in our groups, then went inside for a brief drivers meeting. This day was so much better than the previous day.

We began with a parade at the dam

Then proceeded to do The Tail of the Dragon along with other routes

We stopped at a mall and had lunch at Aubreys Maryville. Then we continued.

We stopped at the Appalachian Driving then proceeded to go to have dinner at Tapoco Lodge

From there, I followed Tyler in a Miami Blue GT3 and Danny in a red Turbo S while Colby was driving Gregs white GT3

Then Colby sat with me while we followed Tyler, Miami Blue GT3, who was following Greg, White GT3 but then Tyler turned around to get Jeff, Green GT3.

DAY 4, Sunday, June 6, 2021

There was a drive but I needed to get home so I left around 8am and arrived home around noon.

Here is the itinerary for that day

FINAL ASSESSMENT

A fantastic event held by a fantastic group and met some fantastic people for whom I hope to have a long friendship with.

I did register for Octobers event.

First Vaccine

At the end of 2020 there were rumblings of 2, possibly 3, vaccines that were in development. The Pfizer, Moderna, and Johnson & Johnson. The first 2 require 2 doses a couple of weeks apart. the 3rd on required 1.

My concern was how rushed this vaccine came down the pipeline. This is the exact premise of how the Zombie Apocalypse or the end of humanity begins. Oh sure, this vaccine prevents you from contracting the Covid Virus that strange enough affects everyone different no matter what age or shape you’re in. But whose to know what the side effects are 1, 3, 5, 10 years from now could be?

Are we witnessing the origin of something devastating in the next 5 – 10 years??

Regardless, I made the decision to sign up. At the time, the vaccine had been given to front line workers and the elderly. Then a new wave opened up with some pretty interested qualifications. From being a care giver to being a parent of a child who has a condition to just having a BMI of over 21, which is everyone.

I had dinner with a friend of mine, 40 and in great shape, and said he received his first dose and he said he was a caregiver. They didn’t check to see if his role was true or not. He also told me a friend of ours signed up to be on a list of “excess” un used doses. Apparently, they have shelf life and if they don’t have enough people to receive it they have to throw it away so instead they give it to anyone who wants it.

I asked him to send me the site where he signed up. The Site was MyVaccineGeorgia.com. Which I found it a little tough to navigate through but when I did find a provider it sent me to a scheduling page where I figured out I had to constantly refresh until there was a time and date available. And when I did find it when I went to click on it the appointment had been taken.

I searched through a neighboring neighborhood FaceBook page on posts that contained people helping people to sign up. I found a post where a nurse who offered to assist anyone with signing up for the vaccine

I contacted her and she was able to get my girlfriend and I an appointment on March 19, 2021 and she was able to get us an appointment on March 26th.

We gave her our names, cell numbers, emails and availability. She asked us if we were willing to travel and the answer was, yes. She booked us 2 appointments with a Drive Through facility in Clarkesville, Georgia about an hour and 20 minutes from Atlanta.

We received and email with a questionnaire to fill our which ultimately gave us a QR code for us to show when we arrived at the facility

We arrived at the facility and navigated through cones where people were checked through by FEMA and some Military personnel. Very OutBreakish feeling.

My first Track Day at Road Atlanta

My journey of driving fast through the twisty road of the mountains has led me to finally gain the nerve to take my car to the track. With the help of some friends that I met through a FaceBook group I registered for a Track Day at Michelin Raceway Road Atlanta.

You just can’t show up and take your car through their 2.54 miles consisting of 12 turns.

The best way is to join a group that offers Track Days. The group basically rents out the track then sells individuals similar to how a promoter will pay a group then sell tickets.

There are many groups that rent out tracks all over so you have to check their website to see when and where tracks are available along with their procedures and requirements to participate in their event, these are the ones that I know of:

My friend Drew Fausnacht introduced me to Just Track It. I went to their website and found an available date and time (they fill up quick) and registered for their Friday, March 5th event which was the only one that I could register as a Novice and with an instructor. The other levels you could register are: Intermediate 1, Intermediate 2, and Advanced.

THE COST

I registered for the event on January 14, 2021 and the cost of the event was $299.99 + $50 for an instructor for the day. The instructor basically barters his time to help Novice drivers in exchange for a free track day. Not a bad deal. I opted for everything they had to offer;Vinyl Car number set, Apex Pro and OBD2 sensor so you can nerd out on technical data of your run. I did not install these on this go around, Lunch time touring laps, Professional photo package, and an instructor

My instructor was Tom Crookston, an older gentlemen who tracks his Porsche 924 with his best lap time of 1:40. The track record is 51 seconds set by a Formula 1 Ferrari F2003.

PRIOR TO RACE DAY

JTI, Just Track It, did an amazing job at making sure you knew what to do prior to arriving to the track.

First and fore most you need a SA2010 or newer Helmet. I chose a full faced matt black helmet from Bell that costs $469 that I purchased from the Shop at Atlanta Motorsports Park. I probably could have found it cheaper online but I needed to make sure the helmet fit properly and I couldn’t just go and try it out an not buy it from them.

The second and third crucial thing is to make sure the car you’re taking is safe by having a professional auto shop inspect and sign off along with using high temperature brake fluid. I took my Porsche to EuroFed in Decatur, Georgia who works on Porsches and other European cars.

They recommended Motul RBF 600 instead of their sponsored Liqui Moli brand brake fluid. I thought it was an upsale but after doing some research they indeed sold me on the better fluid.

REGISTRATION AND THE DAY AT THE TRACK

I showed up the evening before the event to register, turn in my Tech form, and get instructions. When arriving to Road Atlanta, they did a temperature check then directed me to their in field Paddock where I went into a Blue trailer, gave them my name and they gave me a lanyard with the times of the sessions, a wrist band, vinyl decal numbers, and my Apex Pro and OBD sensor which I did not use.

Prior to arriving to the track, at 7:30am, I made sure to fill up with 93 octane fuel because I knew I would go through at least 1 tank before the day ended. In fact, I ended up having to go and refuel after my 3rd session.

I met up with my friend Drew, who has an awesome corvette and is a hell of a driver, with his girlfriend Angela where they set up a tent toward the back of the paddock.

The drivers meeting began at 8:30 where 2 instructors led us through a series of safety protocols, flag designations, track turns, passing lanes, hand signals, Corner Worker locations, dos and don’ts, and many other helpful information to make sure I maximized my time, enjoyment, and safety for the day.

In the lanyard they gave us was this super handy schedule of our day including heats, classroom, and lunch break.

Unfortunately, when it was our turn to go out, there had been a wreck prior to our session. Which caused a delay and reduction of laps. All good, because the Road Atlanta team made sure the person was safe, the vehicle was out of the way, and the track was back to ideal conditions.

Video just before the crash at Road Atlanta before the Novice group came out.

TRACK VIDEOS

The following 5 videos are from a GoPro camera suction cupped to the top of the windshield which give the best clarity.

IN CONCLUSION

I had the best time! Being on a track with ideal conditions made this one of the best car experiences I have ever had. I had a fantastic instructor and good friends.

Looking forward to doing it again!!